
Problem Statement:
During a recent project, I had a unique challenge: I had to maintain a static IP address, as it had been designated for whitelist access. However, my IP address was constantly changing, presenting a significant challenge in meeting project deadlines. I came up with a solution to send all the traffic through a VPS and provide IP for whitelisting to client.
Burp Suite has options available where a we can tunnel all testing traffic through an established SOCKS proxy.
But before directly jumping into technical jargon let’s understand some basics which we will be using further in the blog below.
What is a SOCKS Proxy?
Socket Secure (SOCKS) is a network protocol that facilitates communication with servers through a firewall by routing network traffic to the actual server on behalf of a client. SOCKS is designed to route any type of traffic generated by any protocol or program. By default, the SOCKS protocol is not secure, so an SSH SOCKS proxy ensures secure, encrypted communication.
SOCKS connections allow for the redirection of specific traffic through the established proxy in order to have more control over how the traffic is being handled.
What is Dynamic Port Forwarding?
Dynamic port forwarding turns your SSH client into a SOCKS proxy server.
Actual Setup
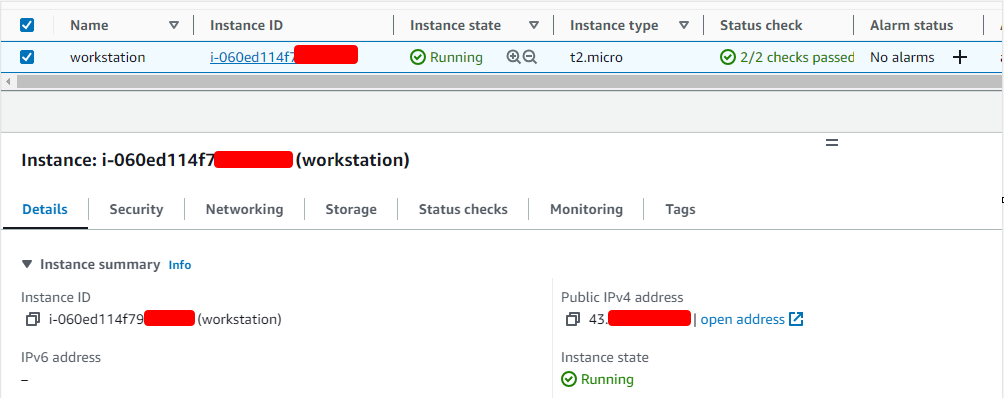
Step 1 : Create a VPS and get Public IP
First step is to create a VPS and get the public IP. I have used the AWS EC2 instance for example but you can use any of your choice.
Step 2: Setting up an SSH SOCKS proxy
It is pretty straightforward as it only requires that we provide an additional flag to the SSH command:-D. This flag expects a port number for our SOCKS proxy to listen on. For example:
ssh -D 9090 -N -C <user>@<VPS_IP>This creates a SOCKS proxy on port 9090.
The -N means we aren’t going to be interacting with this connection.
The -C tells SSH to compress data before sending it over the wire.

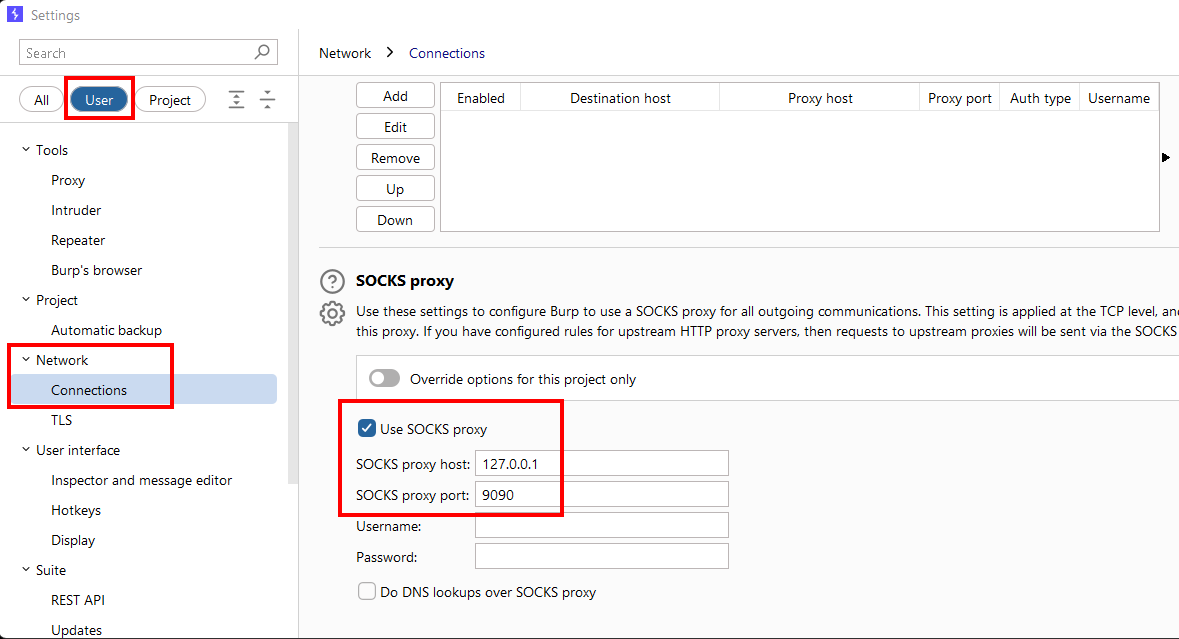
Step 3: Update BurpSuite Configuration
Navigate to Settings -> User Option -> Network -> Connections -> SOCKS proxy
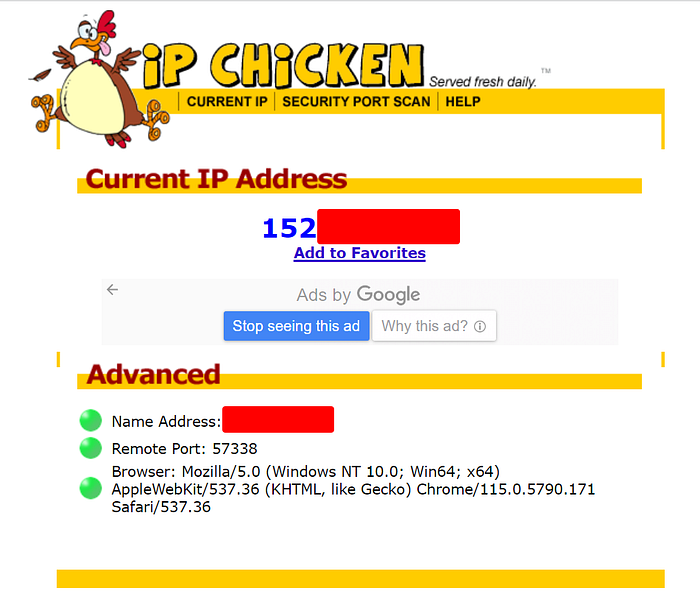
Step 4: Verify the Proxy
First let’s check our public IP by navigate to ipchicken.com (You can use any preferred site).
Now let’s check again once we tunnel our traffic through proxy.
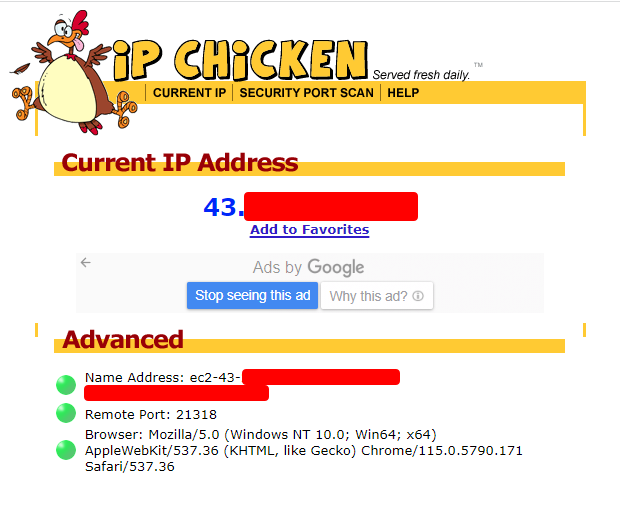
Note: Make sure you send your traffic through BurpSuite else you won’t see any change in your public IP.
Hope you learned something new and enjoyed my blog. Stay safe, stay curious.
Thanks for reading!
~Nishith K
Connect with me:
- Twitter: https://twitter.com/busk3r
- LinkedIn: https://in.linkedin.com/in/nishithkhadadiya
